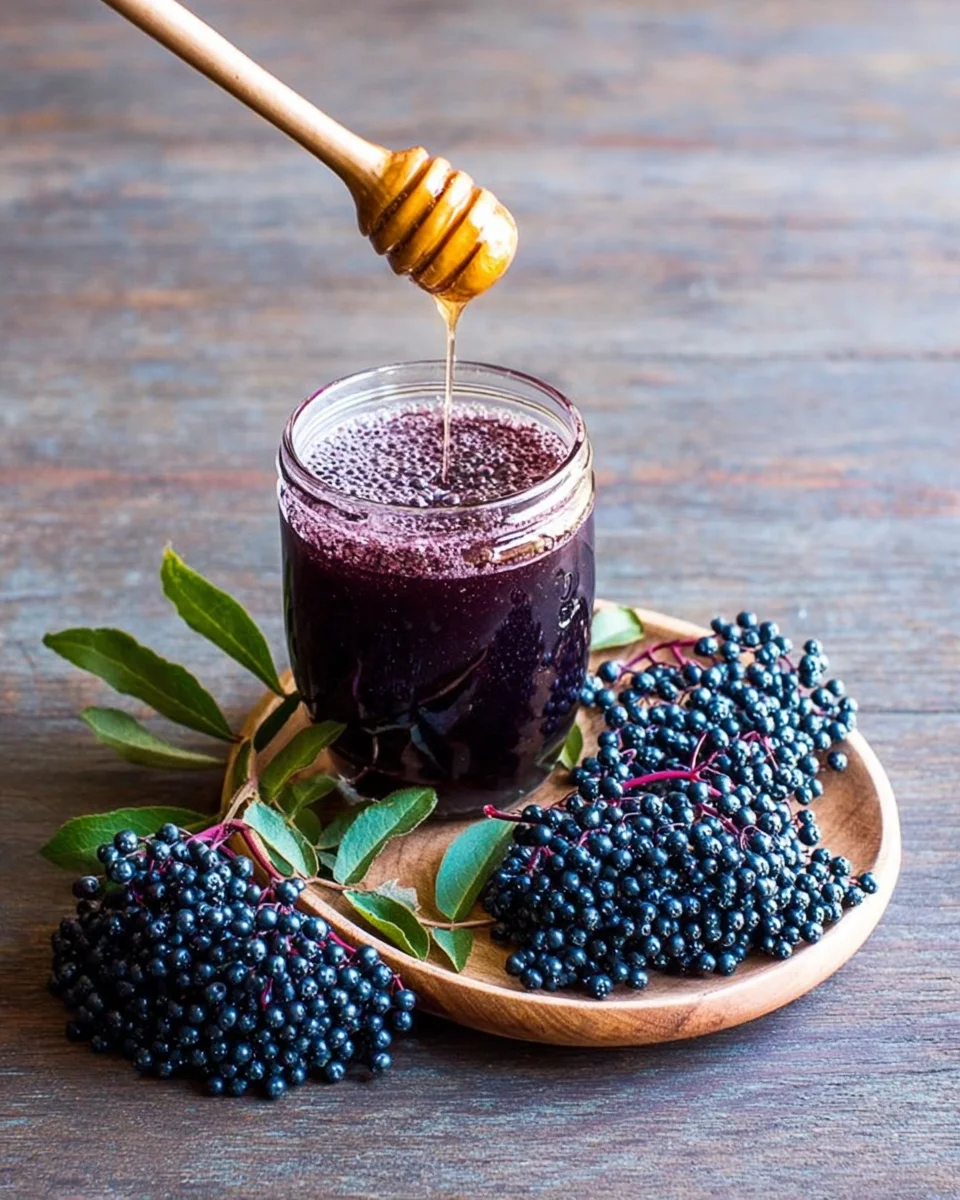
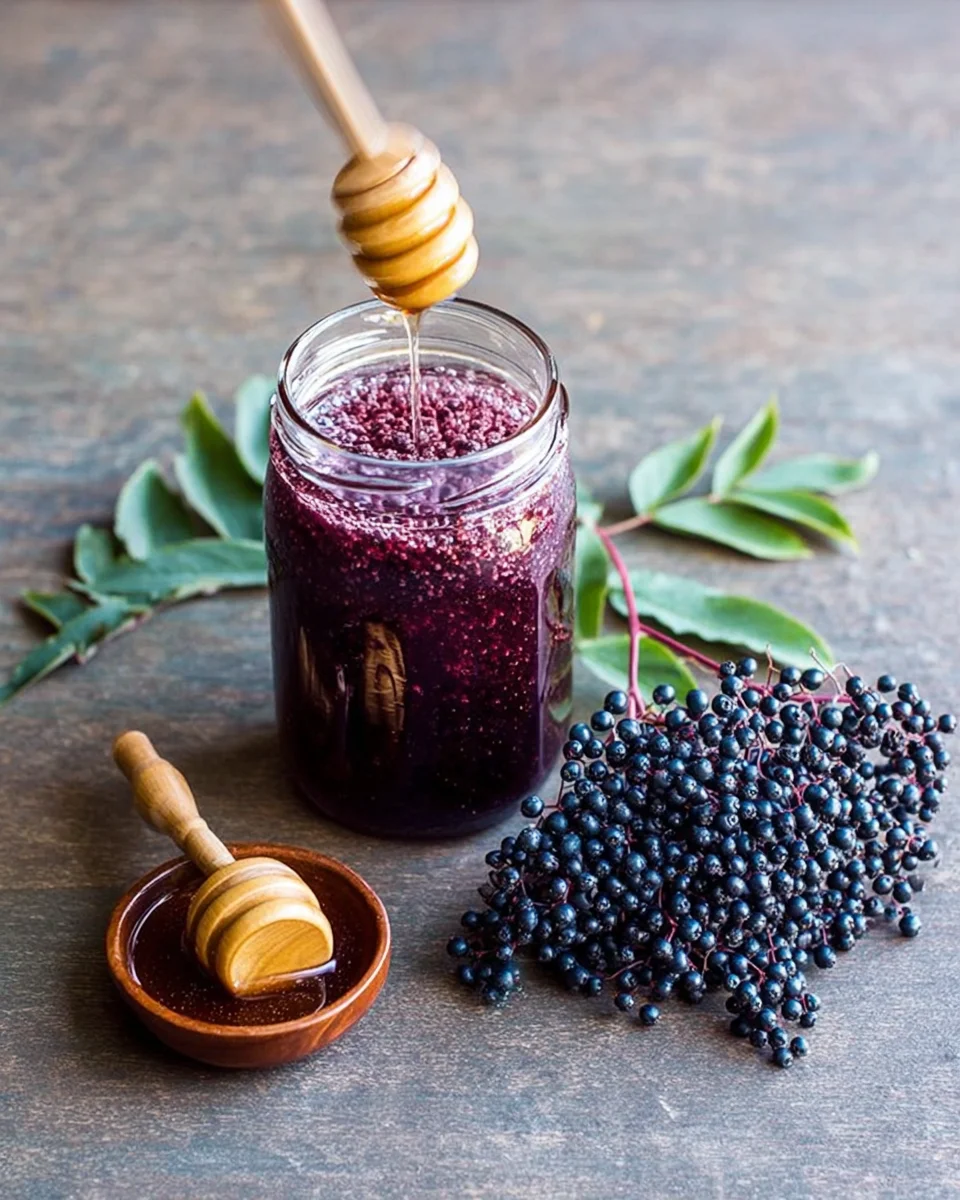
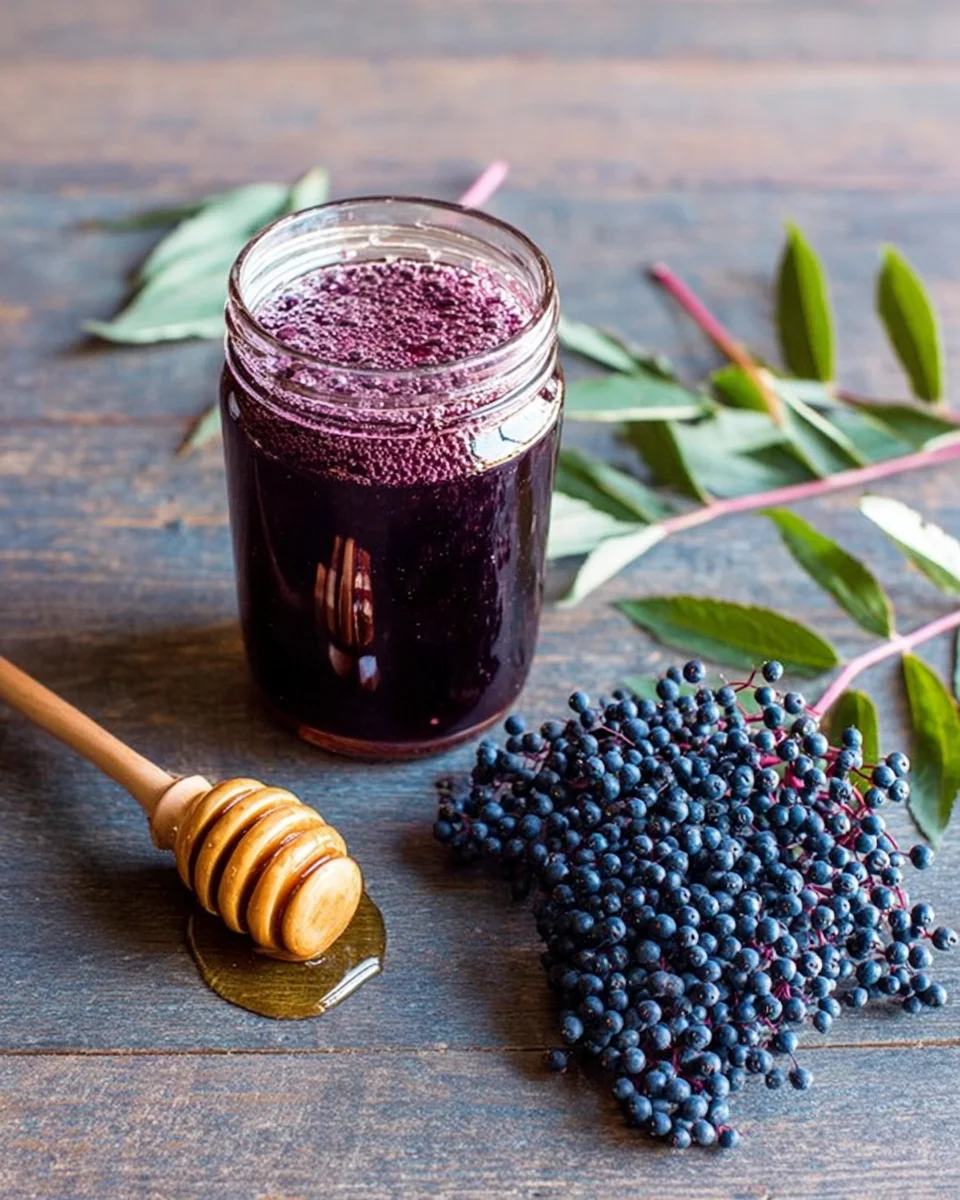
Fermented Elderberry Honey
Fermented Elderberry Honey is not just a treat; it’s a delicious way to support your immune system. This unique recipe combines the tangy flavor of elderberries with the natural sweetness of raw honey, resulting in a delightful concoction perfect for various occasions. Whether you’re looking to ward off colds or simply enjoy a healthy snack, this fermented honey elderberry blend stands out for its flavor and health benefits.

Why You’ll Love This Fermented Elderberry Honey
Fermented Elderberry Honey offers numerous advantages that make it a must-try.
- Immune Boosting: Packed with antioxidants, elderberries are known for their ability to enhance immune function.
- Natural Sweetener: This honey blend serves as a delicious alternative to processed sugars, perfect for sweetening teas or yogurt.
- Versatile Use: Use it in recipes, as a topping, or directly by the spoonful for wellness support.
- Easy to Make: With minimal ingredients and straightforward steps, this recipe is simple enough for anyone to master at home.
- Long Shelf Life: Once fermented, this elderberry honey can last for months, making it a great pantry staple.
Tools and Preparation
Before diving into making your Fermented Elderberry Honey, gather the necessary tools. The right equipment ensures smooth preparation and fermentation.
Essential Tools and Equipment
- Pint-sized mason jar
- Plastic storage lid or parchment paper
- Stirring utensil
Importance of Each Tool
- Pint-sized mason jar: Ideal for fermentation, allowing enough space for bubbles while keeping the mixture safe from contaminants.
- Plastic storage lid or parchment paper: Helps prevent rust while allowing air circulation during fermentation.
- Stirring utensil: Necessary for mixing and ensuring even distribution of the honey around the elderberries.
Ingredients
Creating Fermented Elderberry Honey requires just a few simple ingredients that pack a punch in terms of flavor and health benefits.
For the Elderberry Honey Mixture
- 1 cup fresh black or blue elderberries (do not use red elderberries)
- 1-1.5 cups raw honey
Instructions
- Put the elderberries into a pint-sized mason jar, then add the honey to cover the berries, leaving at least an inch of headspace at the top of the jar.
- Cap the jar with a plastic storage lid or use a piece of parchment paper underneath the metal lid. Invert the jar for about 30 minutes or longer to make sure that all of the elderberries are coated with honey.
- Turn the jar upright again. After the elderberries and honey have settled and all of the air bubbles are gone, you may need to add a bit more honey to cover the berries.
- Loosen the lid to allow air to escape during fermentation and place the jar somewhere out of the way. For the first 2-3 days, it is helpful to invert the jar daily then turn it upright again. Be sure to tighten the lid before inverting then loosen again once upright.
- Within about 2-3 days (could be longer in cooler temperatures), you should begin to see small bubbles on the surface, and the honey will be noticeably runnier.
- After one or two weeks, you will see a lot of bubbles! Give it a stir now and then, and it will really bubble up. The honey is ready at any point after this and will continue to slowly ferment for weeks and months.
- Strain out the elderberries before consuming.
- Take a spoonful two to three times per day when you feel a sickness coming on to shorten the duration of a cold or flu.
Notes
You can use dried elderberries instead of fresh if you would like, but they will need to be rehydrated in water first before combining with the honey.
Serving: Take a spoonful two to three times per day when you feel a sickness coming on to shorten the duration of a cold or flu.
Nutrition
Serving: 1 Tablespoon | Calories: 64 kcal
For Garnish
- 2 tablespoons fresh parsley, finely chopped
How to Make Fermented Elderberry Honey
To create your own Fermented Elderberry Honey, follow these simple steps:
Step 1: Prepare Your Jar
Place your fresh elderberries into your clean pint-sized mason jar.
Step 2: Add Honey
Pour enough raw honey over the berries until they are fully submerged while leaving some headspace at the top.
Step 3: Mix Thoroughly
Invert your jar several times over about 30 minutes so that all berries get coated evenly with honey.
Step 4: Settle It Down
Return your jar upright after mixing and check if more honey is needed after settling.
Step 5: Allow Fermentation
Loosen your lid slightly and store your jar in an area where it won’t be disturbed while allowing air escape during fermentation.
Step 6: Watch for Bubbles
Check back within 2-3 days; observe small bubbles forming on top as fermentation begins!
Step 7: Stir Occasionally
After one week, give it an occasional stir as bubbling increases—a sign that fermentation is active!
Step 8: Strain Before Enjoying
Strain out elderberries before consuming your sweet creation!
Enjoy your homemade Fermented Elderberry Honey as part of your daily wellness routine!
How to Serve Fermented Elderberry Honey
Fermented elderberry honey offers a unique, tangy flavor that can enhance various dishes. Here are some delightful serving suggestions to make the most of this immune-boosting treat.
On Toast
- Use it as a spread on whole-grain or sourdough toast for a nutritious breakfast or snack.
In Smoothies
- Blend a spoonful into your favorite smoothie for added sweetness and health benefits.
As a Salad Dressing
- Whisk with olive oil and vinegar for a delicious, antioxidant-rich salad dressing.
Mixed Into Yogurt
- Stir it into plain yogurt for a flavorful and healthy breakfast option or dessert.
In Herbal Teas
- Add a spoonful to your herbal tea for a natural sweetener that also boosts immunity.
With Cheese Platter
- Pair it with cheese and crackers for an elegant appetizer at gatherings.
How to Perfect Fermented Elderberry Honey
Perfecting your fermented elderberry honey is easy with some simple tips. Follow these suggestions to ensure the best results.
- Choose the right berries: Always use fresh black or blue elderberries. Avoid red elderberries as they can be toxic.
- Use raw honey: Opt for raw honey to retain maximum nutrients and fermentation qualities.
- Monitor fermentation: Check regularly for bubbles. The presence of bubbles indicates active fermentation, which is key to flavor development.
- Adjust sweetness: If you prefer a sweeter taste, add more honey during the initial mixing phase before fermentation starts.
- Store properly: Keep the jar in a cool, dark place to encourage fermentation without overheating or spoiling the berries.
- Don’t rush it: Allow at least 1-2 weeks for fermentation; flavors deepen over time, enhancing health benefits.
Best Side Dishes for Fermented Elderberry Honey
Fermented elderberry honey pairs wonderfully with many side dishes, adding flavor and health benefits. Here are some great options to enjoy alongside it.
- Cheese Board
A selection of cheeses complements the sweetness of fermented elderberry honey beautifully. - Fresh Fruit Salad
Mix seasonal fruits and drizzle with fermented elderberry honey for an enticing dessert. - Whole Grain Crackers
Serve crunchy crackers on the side to balance the sweet and tangy flavors of the honey. - Roasted Vegetables
Drizzle over roasted carrots or Brussels sprouts for an unexpected twist in flavor. - Oatmeal
Stir into warm oatmeal topped with nuts and seeds for a nourishing breakfast option. - Pasta Salad
Toss in pasta salads as a dressing ingredient for added zest and nutrition.
Common Mistakes to Avoid
When making Fermented Elderberry Honey, it’s easy to make a few common mistakes. Here are some tips to ensure your fermentation process goes smoothly.
- Using Red Elderberries: Red elderberries can be toxic. Always use fresh black or blue elderberries for safety and flavor.
- Not Leaving Headspace: Failing to leave at least an inch of headspace in the jar can lead to overflow during fermentation. Always ensure you have enough space for expansion.
- Sealing the Jar Too Tightly: Sealing the jar too tightly can trap gases, leading to a messy explosion. Use a loose lid to allow air to escape during the fermentation process.
- Ignoring Temperature: If it’s too cold, fermentation will slow down. Keep your jar in a warm area for optimal bubbles and fermentation speed.
- Skipping the Stirring: Forgetting to stir occasionally will hinder the fermentation process. Regular stirring helps distribute the bubbles and ensures even fermentation.
Refrigerator Storage
- Store Fermented Elderberry Honey in a sealed glass jar.
- It can last up to 6 months in the refrigerator if stored properly.
Freezing Instructions
- You can freeze Fermented Elderberry Honey in ice cube trays for easy serving.
- Once frozen, transfer cubes into an airtight freezer bag. They can last up to a year.
Reheating Instructions
- Oven: Preheat oven to low heat (around 200°F). Place honey in an oven-safe container and warm gently without boiling.
- Microwave: Use short bursts of heat (10-15 seconds) on low power. Stir between intervals until warmed but not hot.
- Stovetop: Use a double boiler method over low heat, stirring constantly until warmed through.
Frequently Asked Questions
What is Fermented Elderberry Honey?
Fermented Elderberry Honey is a natural remedy made by fermenting elderberries with raw honey, creating a delicious and nutritious treat that boosts immunity.
How long does it take to ferment?
Typically, it takes about 1-2 weeks for the fermentation process to complete. You’ll see bubbles indicating that fermentation is happening within 2-3 days.
Can I use dried elderberries?
Yes, you can use dried elderberries! Just ensure they are rehydrated in water before combining them with honey.
What are the health benefits of Fermented Elderberry Honey?
This concoction is known for its immune-boosting properties and is considered a natural remedy for colds and flu due to its antibacterial and antiviral qualities.
Final Thoughts
Making Fermented Elderberry Honey is not only simple but also rewarding! This versatile recipe allows you to enjoy a healthy treat while boosting your immune system. Feel free to customize it by adding spices or other fruits for added flavor!
Fermented Elderberry Honey
- Total Time: 0 hours
- Yield: Approximately 12 servings (based on using one cup of elderberries) 1x
Description
Elevate your wellness routine with our Fermented Elderberry Honey! This delightful concoction combines the antioxidant-rich benefits of elderberries with the natural sweetness of raw honey, creating a unique flavor that’s perfect for enhancing your favorite foods or enjoyed on its own. Ideal for combating colds and flu, this easy-to-make recipe is a pantry staple that supports your immune system while tantalizing your taste buds.
Ingredients
- 1 cup fresh black or blue elderberries (avoid red elderberries)
- 1–1.5 cups raw honey
- Optional: Fresh parsley for garnish
Instructions
- Place fresh elderberries in a pint-sized mason jar and pour enough raw honey to cover them, leaving about an inch of headspace.
- Cap the jar with a plastic lid or parchment paper; invert it for 30 minutes to ensure all berries are coated.
- Return jar upright and check for air bubbles; add more honey if necessary to cover berries.
- Loosen the lid slightly to allow air escape during fermentation and store in a cool, dark place.
- After 2-3 days, observe small bubbles forming as fermentation begins; stir occasionally.
- The mixture is ready after 1-2 weeks of fermentation—strain out the elderberries before use.
- Prep Time: 15 minutes
- Cook Time: Fermentation time varies (1–2 weeks)
- Category: Dessert
- Method: Fermentation
- Cuisine: Homemade remedy
Nutrition
- Serving Size: 1 tablespoon (21g)
- Calories: 64
- Sugar: 17g
- Sodium: 0mg
- Fat: 0g
- Saturated Fat: 0g
- Unsaturated Fat: 0g
- Trans Fat: 0g
- Carbohydrates: 17g
- Fiber: 0g
- Protein: 0g
- Cholesterol: 0mg