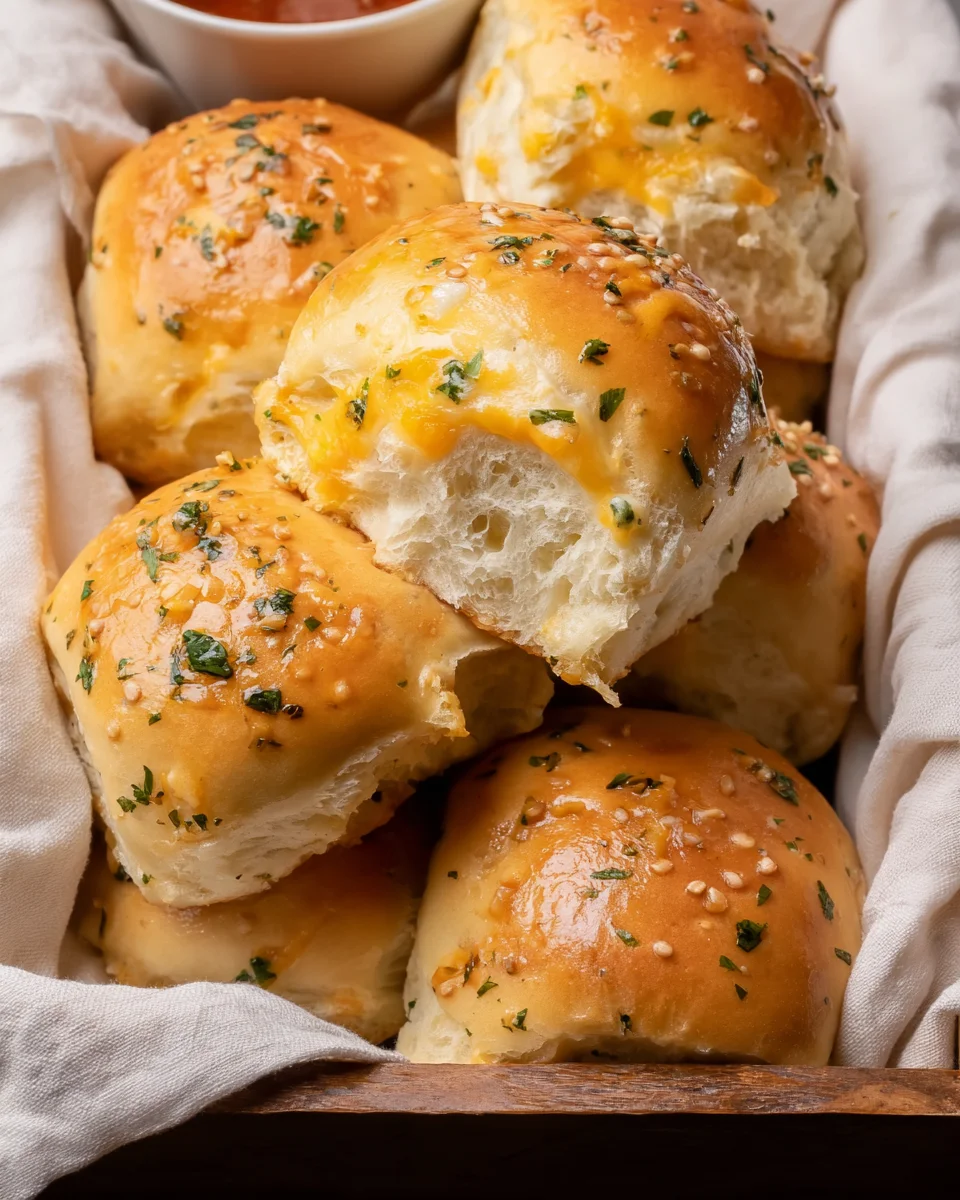
Cheesy Garlic Dinner Rolls
These Cheesy Garlic Dinner Rolls are the ultimate comfort food that brings warmth and flavor to any table. Soft, fluffy, and infused with a rich garlic taste, these rolls are packed with gooey cheese that melts in your mouth. Perfect for family dinners, holiday gatherings, or just a cozy night in, they elevate any meal to a new level of deliciousness. The combination of melted butter and fresh herbs adds an irresistible finish that will keep everyone coming back for seconds!
Why You’ll Love This Recipe
- Easy to Make: With simple ingredients and straightforward steps, these rolls are perfect for both novice and experienced bakers.
- Flavor Packed: The combination of garlic and cheese creates a mouthwatering experience that enhances any dish.
- Versatile Side: Serve these rolls with pasta, soups, stews, or as a standalone snack—perfect for any occasion.
- Customizable: Feel free to experiment with different cheeses or add herbs to create your own unique flavor profile!
- Perfectly Soft: Achieve the ideal fluffy texture that pairs beautifully with any meal.
Tools and Preparation
To prepare your cheesy garlic rolls successfully, you’ll need a few essential tools in your kitchen.
Essential Tools and Equipment
- Mixing bowl
- Baking dish
- Kitchen towel
- Rolling pin
- Whisk
Importance of Each Tool
- Mixing bowl: A sturdy mixing bowl is crucial for combining the dough ingredients effectively.
- Baking dish: Ensure you have a greased baking dish to allow the rolls to rise properly before baking.
- Kitchen towel: Use it to cover the dough during rising times to keep it warm and moist.
- Rolling pin: This tool helps flatten the dough evenly for filling.
Ingredients
For the Dough
- 2 ¼ teaspoons active dry yeast (1 packet)
- 1 cup warm milk (110°F)
- ¼ cup granulated sugar
- ¼ cup unsalted butter, melted
- 1 teaspoon salt
- 2 large eggs
- 3 ½ cups all-purpose flour (more for dusting)
For the Filling
- 1 cup shredded cheese (mozzarella or cheddar)
- 4 cloves garlic, minced
For Brushing and Garnishing
- ¼ cup unsalted butter, melted (for brushing)
- 1 tablespoon fresh parsley, chopped (for garnish)
How to Make Cheesy Garlic Dinner Rolls
Step 1: Activate the Yeast
In a small bowl, mix the warm milk with granulated sugar and yeast. Let it sit for about 5-10 minutes until it becomes frothy.
Step 2: Make the Dough
In a large mixing bowl, combine melted butter, salt, eggs, and the activated yeast mixture. Gradually add all-purpose flour while mixing until a soft dough forms.
Step 3: Knead the Dough
Flour your work surface and knead the dough for about 5-7 minutes until it becomes smooth and elastic.
Step 4: First Rise
Place the kneaded dough into a greased bowl. Cover it with a kitchen towel and let it rise in a warm place for 1-2 hours or until it has doubled in size.
Step 5: Prepare the Filling
In a separate bowl, mix minced garlic with shredded cheese. Set this mixture aside for later use.
Step 6: Shape the Rolls
After punching down the risen dough, divide it into 12 equal pieces. Flatten each piece slightly and place about a tablespoon of cheese and garlic filling in the center. Pinch the edges together to seal them before shaping into balls.
Step 7: Second Rise
Arrange the shaped rolls seam-side down in a greased baking dish. Cover them again with a cloth and let rise for another 30-45 minutes until puffy.
Step 8: Bake the Rolls
Preheat your oven to 375°F (190°C). Brush each roll with melted butter before placing them in the oven. Bake for approximately 20-25 minutes or until they turn golden brown.
Step 9: Finishing Touches
Once baked, remove your cheesy garlic rolls from the oven. Brush them again with melted butter and sprinkle fresh parsley on top for added flavor.
Step 10: Serve
Enjoy these delightful cheesy garlic rolls warm as an amazing side dish to complement any meal!
How to Serve Cheesy Garlic Dinner Rolls
Cheesy Garlic Dinner Rolls are incredibly versatile and can complement many dishes. Here are some delightful ways to serve them that will enhance your dining experience.
As a Side with Soup
- Creamy Tomato Soup: These rolls pair wonderfully with a warm bowl of creamy tomato soup, perfect for dipping.
- Chicken Noodle Soup: Enjoy the soft texture of these dinner rolls alongside a hearty chicken noodle soup for a comforting meal.
With Pasta Dishes
- Spaghetti Bolognese: Serve these rolls as a side to soak up the rich sauce of spaghetti bolognese.
- Fettuccine Alfredo: The cheesy garlic flavor complements the creamy fettuccine alfredo beautifully, making each bite a delight.
For Family Gatherings
- Barbecue Dishes: These rolls are excellent with barbecue chicken or ribs, adding a cheesy twist to your outdoor meals.
- Salads: Pair them with fresh salads like Caesar or Greek salad for a balanced meal with added texture.
As a Snack
- With Dips: Serve warm with dips like marinara or cheese sauce for an irresistible snack.
- For Breakfast: Enjoy them toasted and spread with butter, jam, or cream cheese for a delicious morning treat.
How to Perfect Cheesy Garlic Dinner Rolls
Creating the perfect Cheesy Garlic Dinner Rolls requires attention to detail. Here are some helpful tips to ensure they turn out fluffy and flavorful.
- Use Warm Milk: Activating the yeast in warm milk helps it rise properly, resulting in fluffier rolls.
- Knead Well: Proper kneading develops gluten, giving the dough structure and elasticity, which leads to soft rolls.
- Let It Rise Fully: Allowing the dough enough time to rise will make your dinner rolls light and airy. Don’t rush this step!
- Brush Generously: Brushing melted butter on top before baking adds flavor and gives the rolls a beautiful golden color.
- Experiment with Cheese: Try different cheeses like pepper jack or gouda for varied flavors that can elevate your rolls even more.
Best Side Dishes for Cheesy Garlic Dinner Rolls
Cheesy Garlic Dinner Rolls pair well with various dishes. Here are some great options to consider when planning your meals.
- Roasted Vegetables: A mix of seasonal vegetables roasted until caramelized complements the richness of the rolls nicely.
- Grilled Chicken Salad: A light grilled chicken salad balances out the heaviness of the cheesy garlic rolls, creating a refreshing meal.
- Stuffed Peppers: Colorful stuffed peppers filled with rice and ground meat make a hearty addition alongside these fluffy rolls.
- Coleslaw: A tangy coleslaw provides a crunchy contrast that enhances your meal’s texture and flavor profile.
- Mashed Potatoes: Creamy mashed potatoes paired with these rolls create an indulgent comfort food experience.
- Pasta Salad: A chilled pasta salad offers a refreshing counterpoint, making it perfect for warm-weather gatherings.
Common Mistakes to Avoid
Making Cheesy Garlic Dinner Rolls can be a delightful experience, but it’s easy to make mistakes that affect the outcome. Here are some common pitfalls and how to avoid them.
- Incorrect Yeast Activation: Not allowing the yeast to froth properly can lead to dense rolls. Ensure the milk is at the right temperature (110°F) and let it sit for 5-10 minutes until bubbly.
- Overworking the Dough: Kneading too long can make the rolls tough instead of fluffy. Aim for about 5-7 minutes until just smooth and elastic.
- Skipping the First Rise: Rushing through the rising time will result in less airy rolls. Always allow the dough to rise until it doubles in size, about 1-2 hours.
- Not Measuring Flour Correctly: Using too much flour can lead to dry rolls. Spoon and level your flour for accuracy instead of scooping directly from the bag.
- Underbaking or Overbaking: Baking for too long or too short affects texture and flavor. Keep an eye on your rolls and aim for a golden brown color.
Storage & Reheating Instructions
Refrigerator Storage
- Store in an airtight container for up to 3 days.
- Wrap individually in plastic wrap for freshness.
Freezing Cheesy Garlic Dinner Rolls
- Freeze in a single layer on a baking sheet before transferring to a freezer-safe bag.
- Can be stored for up to 3 months.
Reheating Cheesy Garlic Dinner Rolls
- Oven: Preheat to 350°F (175°C). Place rolls on a baking sheet and heat for about 10-15 minutes until warm.
- Microwave: Heat individual rolls on a microwave-safe plate for about 15-20 seconds.
- Stovetop: Lightly toast on low heat in a skillet for a few minutes, flipping occasionally.
Frequently Asked Questions
What makes Cheesy Garlic Dinner Rolls so special?
These rolls are soft, fluffy, and packed with gooey cheese and rich garlic flavor, making them an irresistible side dish.
Can I customize my Cheesy Garlic Dinner Rolls?
Absolutely! You can add herbs like rosemary or thyme, or use different types of cheese such as cheddar or parmesan for varied flavors.
How can I ensure my Cheesy Garlic Dinner Rolls rise properly?
Make sure your yeast is fresh and activated correctly. Also, keep your dough in a warm place during rising.
Are Cheesy Garlic Dinner Rolls suitable for freezing?
Yes! They freeze well and can be stored for up to 3 months, making them perfect for meal prep.
Final Thoughts
These Cheesy Garlic Dinner Rolls are not only delicious but also versatile enough to complement any meal. Their soft texture and cheesy goodness make them a comforting addition to your dinner table. Feel free to customize them with different cheeses or herbs based on your preferences!

Cheesy Garlic Dinner Rolls
- Total Time: 55 minutes
- Yield: Makes approximately 12 rolls 1x
Description
Indulge in the ultimate comfort food with these Cheesy Garlic Dinner Rolls. Soft, fluffy, and bursting with rich garlic flavor, these rolls are generously filled with gooey cheese that melts in your mouth. Perfect for family dinners, holiday gatherings, or a cozy night in, they are sure to elevate any meal. Finished with a brush of melted butter and a sprinkle of fresh herbs, these rolls are not only delicious but also incredibly versatile as they pair beautifully with soups, pastas, and more. Whether you serve them as a side dish or a tasty snack, everyone will be coming back for seconds!
Ingredients
- 2 ¼ teaspoons active dry yeast (1 packet)
- 1 cup warm milk (110°F)
- ¼ cup granulated sugar
- ¼ cup unsalted butter, melted
- 1 teaspoon salt
- 2 large eggs
- 3 ½ cups all-purpose flour
- 1 cup shredded cheese (mozzarella or cheddar)
- 4 cloves garlic, minced
- ¼ cup unsalted butter (for brushing)
- 1 tablespoon fresh parsley, chopped (for garnish)
Instructions
- Activate the yeast by mixing warm milk with sugar and yeast. Let it sit for 5-10 minutes until frothy.
- In a large mixing bowl, combine melted butter, salt, eggs, and the yeast mixture. Gradually add flour until a soft dough forms.
- Knead the dough on a floured surface for about 5-7 minutes until smooth and elastic.
- Place in a greased bowl, cover with a towel, and let it rise in a warm place for 1-2 hours until doubled in size.
- Prepare the filling by mixing minced garlic with shredded cheese.
- Punch down the risen dough and divide it into 12 pieces. Flatten each piece and place filling in the center; seal and shape into balls.
- Place rolls seam-side down in a greased baking dish and let rise again for 30-45 minutes until puffy.
- Preheat oven to 375°F (190°C). Brush rolls with melted butter before baking for 20-25 minutes until golden brown.
- Remove from oven, brush again with melted butter, sprinkle parsley on top, and serve warm.
- Prep Time: 30 minutes
- Cook Time: 25 minutes
- Category: Side Dish
- Method: Baking
- Cuisine: American
Nutrition
- Serving Size: 1 serving
- Calories: 210
- Sugar: 4g
- Sodium: 260mg
- Fat: 8g
- Saturated Fat: 5g
- Unsaturated Fat: 2g
- Trans Fat: 0g
- Carbohydrates: 29g
- Fiber: 1g
- Protein: 6g
- Cholesterol: 30mg