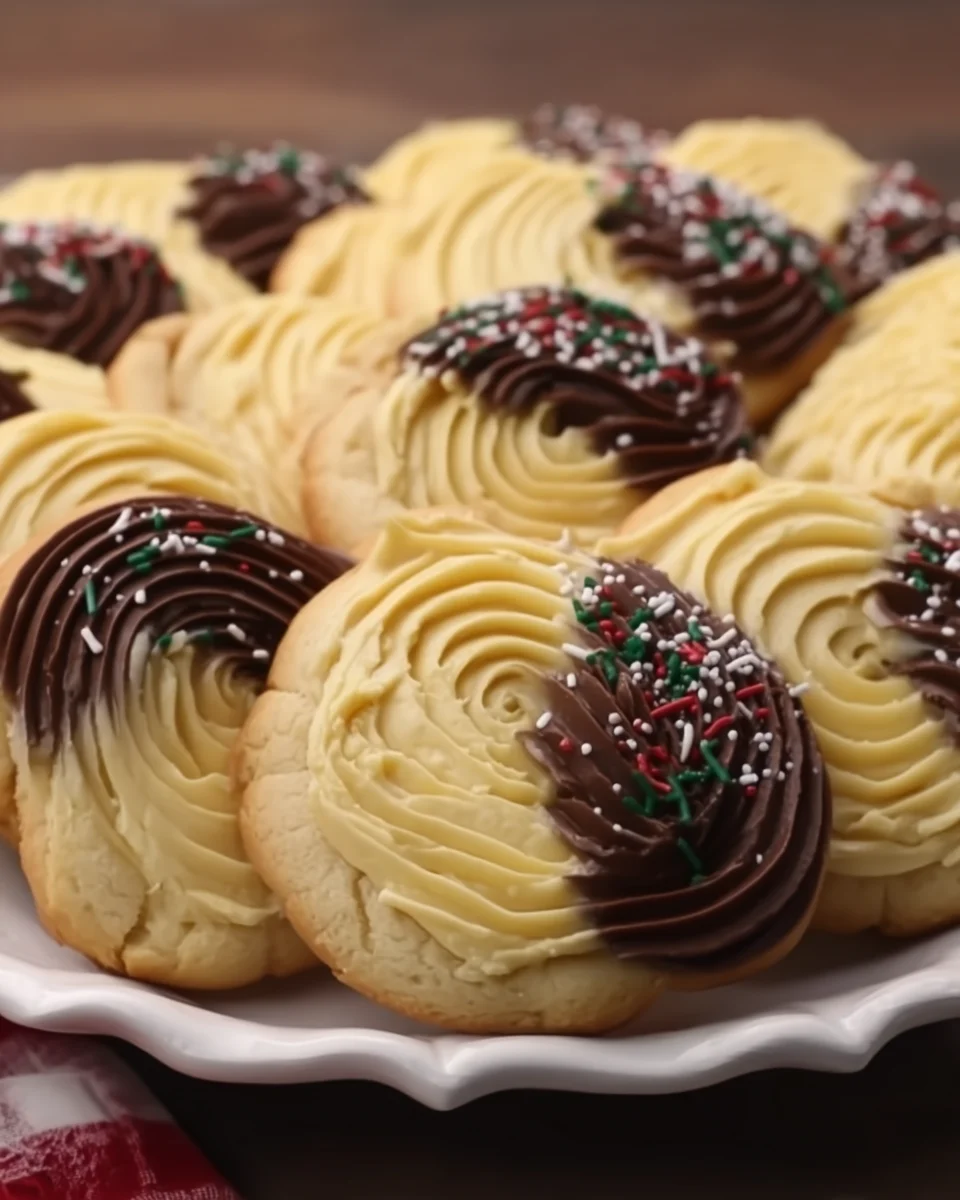
Danish Butter
Danish Butter is a delightful addition to any meal, known for its rich and creamy texture. This homemade butter is perfect for spreading on warm bread or enhancing your favorite baked goods. With its slightly sweet taste and hint of saltiness, Danish Butter elevates dishes for any occasion, from breakfast to dessert. Enjoy the luxurious flavor that will make every bite memorable!
Why You’ll Love This Recipe
- Easy to Make: With just a few simple ingredients, you can whip up this delicious butter in no time.
- Versatile Use: Danish Butter is perfect for spreading on toast, pancakes, or using in baking recipes.
- Customizable Flavor: Adjust the sweetness or add citrus notes with lemon juice to suit your taste.
- Perfect for Gifting: Share this gourmet butter with friends and family as a thoughtful homemade gift.
- Elevate Your Dishes: Its rich flavor enhances everything from breakfast to dessert.
Tools and Preparation
Before diving into the recipe, gather the essential tools that will help you create the perfect Danish Butter.
Essential Tools and Equipment
- Electric mixer
- Mixing bowl
- Airtight container or silicone mold
- Measuring cups and spoons
Importance of Each Tool
- Electric mixer: Ensures a smooth and creamy consistency by thoroughly blending the ingredients.
- Mixing bowl: Provides enough space for mixing without spilling any ingredients.
- Airtight container: Keeps your Danish Butter fresh and ready for use.
Ingredients
For the Base
- 2 cups unsalted butter, softened
- 1 cup powdered sugar
- 1 teaspoon vanilla extract
- 1 teaspoon salt
Optional Enhancements
- 1 tablespoon heavy cream (optional)
- 1 tablespoon lemon juice (optional)
How to Make Danish Butter
Step 1: Soften the Butter
Allow the unsalted butter to come to room temperature until completely softened. This will help achieve a creamy texture that’s easy to work with.
Step 2: Mix the Ingredients
In a mixing bowl, combine the softened butter, powdered sugar, vanilla extract, and salt. Use an electric mixer on medium speed to blend until smooth and creamy.
Step 3: Adjust Consistency
If desired, add heavy cream and/or lemon juice to enhance the flavor and texture. Beat until fully incorporated and smooth.
Step 4: Taste and Adjust
Taste the butter and adjust sweetness or salt to your liking by adding more powdered sugar or salt if necessary.
Step 5: Transfer and Chill
Spoon the butter mixture into an airtight container or silicone mold. Refrigerate for at least 30 minutes to firm up before using.
Step 6: Serve
Once chilled, serve the Danish Butter with fresh bread, pancakes, or use it as a rich ingredient in your baked goods. Enjoy the luxurious flavor!
How to Serve Danish Butter
Danish Butter is a versatile condiment that can elevate a variety of dishes. Whether you spread it on warm bread or use it in baking, there are countless ways to enjoy its rich flavor and creamy texture.
With Fresh Bread
- Artisan Breads: Spread Danish Butter on crusty artisan loaves for a delightful contrast of textures.
- Warm Rolls: Serve with freshly baked dinner rolls that soak up the buttery goodness.
On Pancakes and Waffles
- Breakfast Treat: Top your pancakes or waffles with Danish Butter for a luxurious breakfast experience.
- Maple Syrup Pairing: Drizzle with maple syrup after adding a dollop of butter for added sweetness.
In Baking Recipes
- Cookies: Incorporate Danish Butter into cookie dough for an extra rich flavor.
- Muffins: Use it as a replacement for regular butter in muffin recipes to enhance moisture.
As a Dip
- Veggies: Serve as a dip for fresh vegetables, adding a creamy touch to your snack platter.
- Crackers: Pair with savory crackers for an elegant appetizer.
How to Perfect Danish Butter
Creating the perfect Danish Butter is simple with these helpful tips. Follow these suggestions to enhance your butter-making skills.
- Ingredients: Use high-quality unsalted butter for the best flavor and control over saltiness.
- Mixing Technique: Mix at medium speed until smooth; avoid over-mixing to keep the texture light.
- Flavor Adjustments: Feel free to experiment with flavors like cinnamon or herbs for unique variations.
- Storage Solutions: Store in an airtight container to maintain freshness and prevent absorbing fridge odors.
- Chilling Time: Allow sufficient chilling time after preparing; this helps set the butter’s texture perfectly.
Best Side Dishes for Danish Butter
Serving Danish Butter is not only about spreading it but also pairing it with delicious side dishes. Here are some fantastic options that complement its rich taste.
- Roasted Vegetables: Toss seasonal veggies in olive oil, roast them, and serve alongside Danish Butter for dipping.
- Grilled Corn: Brush grilled corn on the cob with melted Danish Butter for an indulgent twist on a classic favorite.
- Baked Potatoes: Top fluffy baked potatoes with a generous dollop of Danish Butter and chives for extra flavor.
- Cheese Platter: Create a cheese board featuring soft cheeses that pair beautifully with the creamy butter.
- Savory Scones: Serve your scones warm, spread with Danish Butter and jam for delightful contrast.
- Pasta Salad: Mix into pasta salads as a dressing component, adding creaminess and depth of flavor.
Common Mistakes to Avoid
Making Danish Butter is quite simple, but there are a few common mistakes that can affect the final product. Here are some tips to ensure your homemade butter turns out perfectly every time.
- Using Cold Butter: Starting with cold butter makes it hard to achieve a creamy texture. Always allow your unsalted butter to soften at room temperature before mixing.
- Overmixing Ingredients: While you want a smooth blend, overmixing can create an airy texture that isn’t ideal for spreading. Mix just until combined and creamy.
- Ignoring Flavor Adjustments: Forgetting to taste your mixture can lead to a butter that’s either too sweet or too salty. Always sample your Danish Butter and adjust as needed!
- Skipping the Chilling Step: If you skip chilling the mixture, the butter may not firm up properly. Refrigerate for at least 30 minutes to achieve the right consistency.
- Not Using Quality Ingredients: The quality of butter affects flavor and texture. Use high-quality unsalted butter for the best results in your Danish Butter recipe.
Refrigerator Storage
- Store Danish Butter in an airtight container.
- It will last up to 2 weeks in the refrigerator.
- Keep it away from strong odors to maintain its flavor.
Freezing Danish Butter
- For long-term storage, freeze Danish Butter in a silicone mold or airtight container.
- It can be frozen for up to 3 months.
- Thaw it in the refrigerator before use for best results.
Reheating Danish Butter
- Oven: Place the butter in an oven-safe dish at low heat until softened. Keep an eye on it to prevent melting.
- Microwave: Use short bursts of 10-15 seconds on low power to soften without melting completely.
- Stovetop: Gently warm over low heat in a small saucepan, stirring consistently until soft.
Frequently Asked Questions
What is Danish Butter?
Danish Butter is a rich and creamy spread made primarily from unsalted butter, powdered sugar, vanilla extract, and salt. It enhances many dishes with its slightly sweet and buttery flavor.
How do I use Danish Butter?
You can spread Danish Butter on warm bread or pancakes, or incorporate it into baking recipes for added richness and flavor. Its versatility makes it perfect for various uses!
Can I customize my Danish Butter?
Absolutely! You can experiment by adding different extracts or spices like cinnamon or almond extract. This allows you to tailor the flavor profile to your liking.
How should I store leftover Danish Butter?
Store any leftover Danish Butter in an airtight container in the refrigerator for up to two weeks. You can also freeze it for later use.
Is Danish Butter suitable for baking?
Yes! This creamy spread is fantastic for baking as it adds moisture and richness to cakes, cookies, and pastries.
Final Thoughts
Danish Butter is not just a delicious treat; it’s versatile enough for various culinary applications. From spreading on warm bread to enhancing baked goods, this recipe offers room for creativity. Try making it today and feel free to customize flavors that suit your taste!

Danish Butter
- Total Time: 10 minutes
- Yield: Approximately 16 servings 1x
Description
Danish Butter is a luxurious homemade spread that elevates your culinary creations with its rich, creamy texture and delightful taste. Perfect for slathering on warm bread, pancakes, or enhancing baked goods, this easy-to-make butter combines unsalted butter with powdered sugar, vanilla extract, and salt to create a slightly sweet and savory flavor profile. With the option to customize it by adding lemon juice or heavy cream, you can tailor it to your taste. Enjoy Danish Butter as a gourmet addition to any meal or as a thoughtful homemade gift that will impress friends and family alike.
Ingredients
- 2 cups unsalted butter (softened)
- 1 cup powdered sugar
- 1 teaspoon vanilla extract
- 1 teaspoon salt
- Optional: 1 tablespoon heavy cream
- Optional: 1 tablespoon lemon juice
Instructions
- Soften the unsalted butter at room temperature until creamy.
- In a mixing bowl, combine the softened butter, powdered sugar, vanilla extract, and salt. Blend with an electric mixer on medium speed until smooth.
- If desired, add heavy cream and/or lemon juice for enhanced flavor and mix until fully incorporated.
- Taste the mixture and adjust sweetness or saltiness as needed.
- Transfer the butter into an airtight container or silicone mold. Chill in the refrigerator for at least 30 minutes.
- Serve chilled with fresh bread, pancakes, or use in baking recipes.
- Prep Time: 10 minutes
- Cook Time: 0 minutes
- Category: Condiment
- Method: Mixing
- Cuisine: Danish
Nutrition
- Serving Size: 1 tablespoon
- Calories: 100
- Sugar: 3g
- Sodium: 75mg
- Fat: 11g
- Saturated Fat: 7g
- Unsaturated Fat: 3g
- Trans Fat: 0g
- Carbohydrates: 4g
- Fiber: 0g
- Protein: <1g
- Cholesterol: 30mg