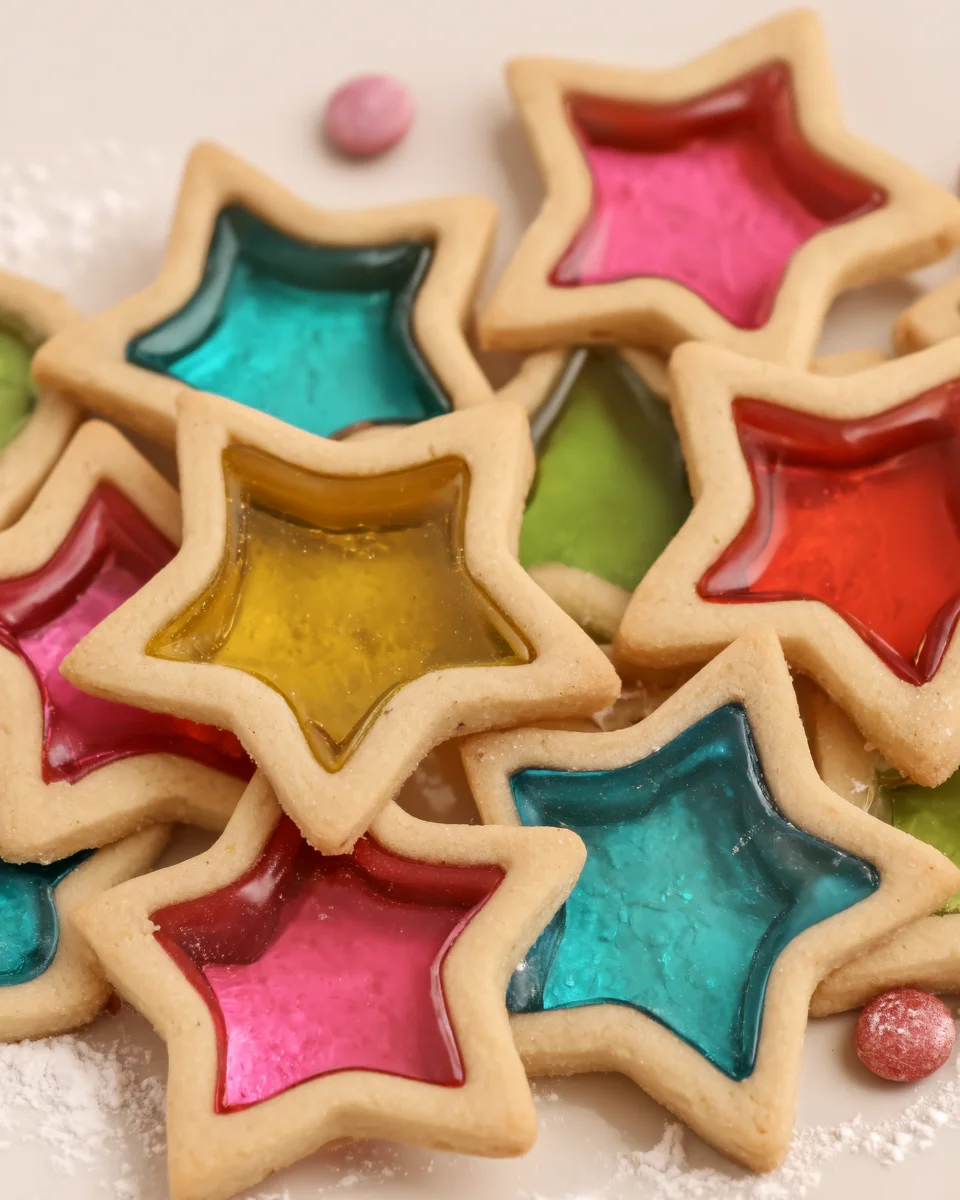
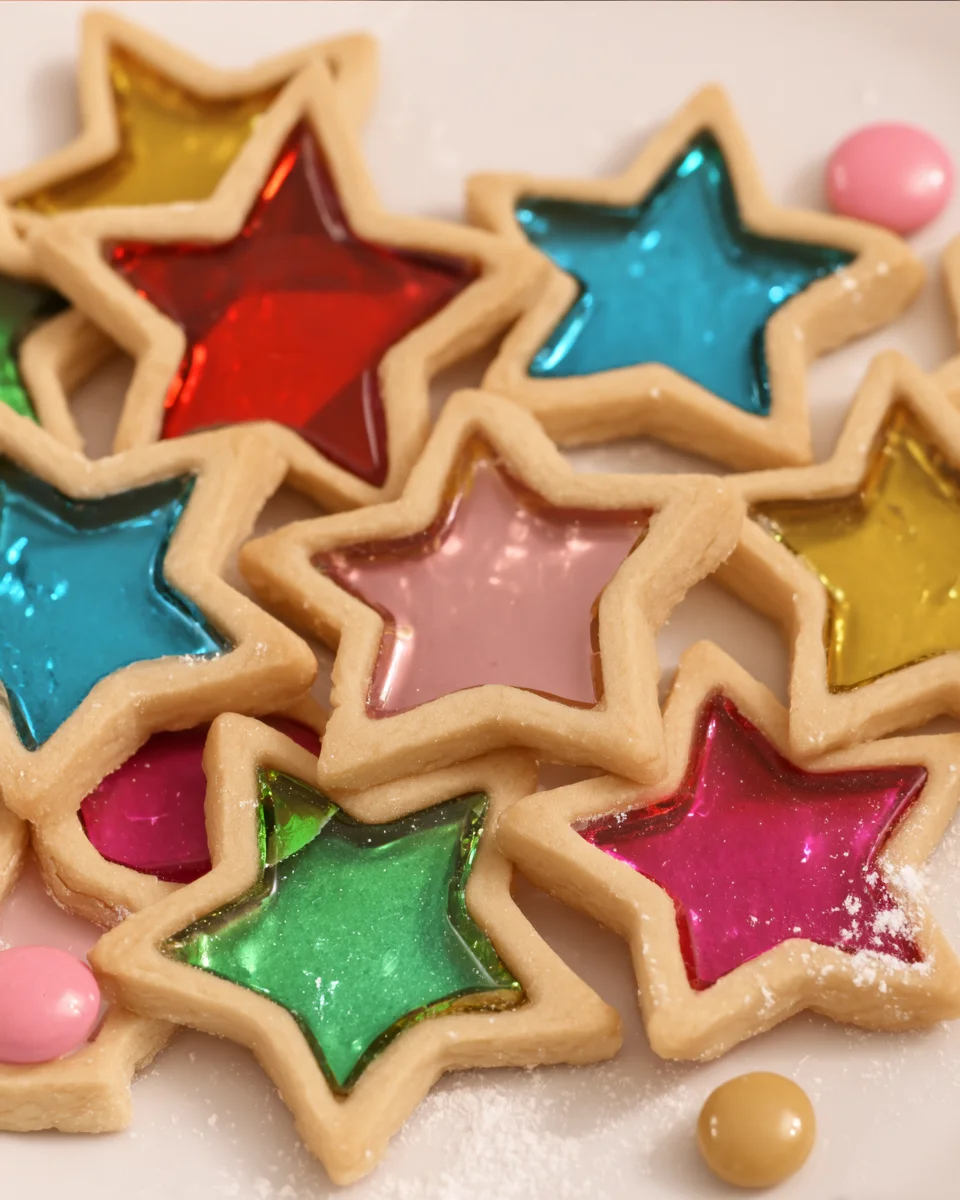
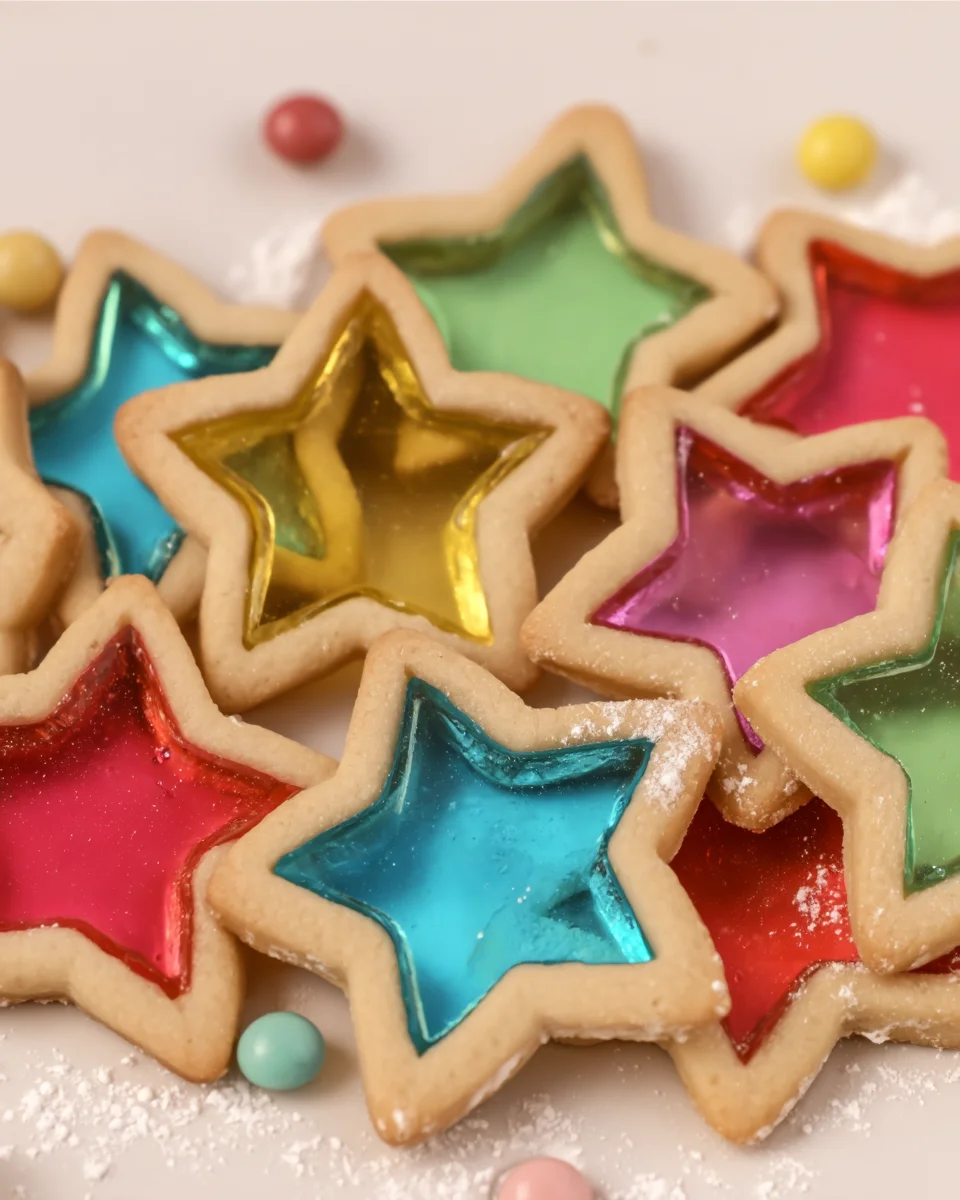
Stained Glass Cookies
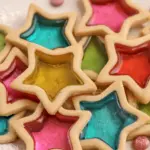
Delight in the colorful beauty of stained glass cookies! These sweet, buttery treats are not only delicious but also a feast for the eyes. Each cookie showcases vibrant candies melted to create stunning stained glass effects that will charm both kids and adults alike. Perfect for holidays, parties, or just a fun baking day at home!
Why You’ll Love This Recipe
- Visually Stunning: The vibrant colors of the melted candies create an eye-catching design that is sure to impress.
- Kid-Friendly Baking: Involve the little ones in the fun! Decorating these cookies is a perfect activity for family bonding.
- Versatile Flavors: With various candy choices, you can customize each batch for different taste preferences and occasions.
- Simple Ingredients: Made with easy-to-find ingredients, these cookies are accessible for bakers of all levels.
- Perfect for Celebrations: Whether it’s a holiday gathering or a birthday party, these cookies add a festive touch to any event.
Tools and Preparation
Before you start baking your stained glass cookies, gather the essential tools. Having everything ready will make the process smoother.
Essential Tools and Equipment
- Mixing bowls
- Whisk
- Cookie cutters
- Rolling pin
- Baking sheets
- Parchment paper
Importance of Each Tool
- Mixing bowls: These are crucial for combining ingredients effectively without spills.
- Cookie cutters: They help create uniform shapes that enhance the visual appeal of your stained glass cookies.
- Rolling pin: A rolling pin ensures even thickness when rolling out your dough, which is key to consistent baking results.
Ingredients
For the Dough
- 2 ¾ cups all-purpose flour
- 1 teaspoon baking powder
- ¼ teaspoon salt
- 1 cup unsalted butter, softened
- 1 cup granulated sugar
- 1 large egg
- 2 teaspoons vanilla extract
- ½ teaspoon almond extract (optional)
For the Stained Glass Effect
- ½ cup assorted hard candies (e.g., Jolly Ranchers, Life Savers)
How to Make Stained Glass Cookies
Step 1: Prepare the Dough
In a bowl, whisk together the flour, baking powder, and salt. In a separate large mixing bowl, cream together the softened butter and granulated sugar until light and fluffy. Add the egg, vanilla extract, and almond extract; mix well. Gradually add the dry ingredients until combined.
Step 2: Chill the Dough
Divide the dough in half and shape each half into a disc. Wrap in plastic wrap and refrigerate for at least 1 hour or until firm.
Step 3: Preheat the Oven
Preheat your oven to 350°F (175°C). Line baking sheets with parchment paper.
Step 4: Roll Out the Dough
On a lightly floured surface, roll out one disc of chilled dough to about ¼ inch thick. Use cookie cutters to cut out cookies, ensuring you use a smaller cutter in the center to create the ‘glass’ shape.
Step 5: Add the Candy
Crush the assorted hard candies into small pieces. Place cookie cutouts on prepared baking sheets. Fill each center with crushed candies.
Step 6: Bake
Bake cookies in preheated oven for 8-10 minutes or until edges are lightly golden. The candy will melt to create that beautiful stained glass effect.
Step 7: Cool and Serve
Allow cookies to cool completely on baking sheets before carefully transferring them to a wire rack. Enjoy your colorful creations!
How to Serve Stained Glass Cookies
Stained glass cookies are not only a delight to eat but also a visual treat that can enhance any occasion. Here are some creative serving suggestions to make the most of these charming cookies.
Festive Cookie Platter
- Arrange various stained glass cookies on a large platter for an eye-catching centerpiece at your holiday gatherings.
Gift Boxes
- Place the cookies in decorative boxes tied with ribbons. They make thoughtful homemade gifts for friends and family.
Cookie Decorating Station
- Set up a cookie decorating station with extra icing and sprinkles. Let kids personalize their cookies for added fun.
Tea Time Treats
- Serve stained glass cookies alongside your favorite tea or coffee for a delightful afternoon snack.
Birthday Party Favors
- Include stained glass cookies in party favor bags. They’re sure to bring smiles to young guests.
Holiday Cookie Exchange
- Bring these colorful cookies to your next cookie exchange. Their unique appearance will stand out among traditional treats.
How to Perfect Stained Glass Cookies
To achieve the best results with your stained glass cookies, consider these helpful tips.
- Chill the Dough: Ensure you refrigerate the dough as instructed. This prevents spreading during baking, helping maintain shape.
- Use Fresh Candies: Select fresh hard candies for vibrant colors and better melting results. Older candies may not melt properly.
- Check Oven Temperature: Use an oven thermometer to ensure your oven is at the correct temperature for even baking.
- Roll Evenly: Roll the dough uniformly to ensure consistent thickness. This helps all cookies bake evenly and enhances their appearance.
- Experiment with Shapes: Try different cookie cutter shapes for variety. Stars, hearts, and holiday-themed shapes can add excitement.
- Cool Completely Before Serving: Allow the cookies to cool fully on a wire rack before serving or storing. This ensures they hold their shape and texture well.
Best Side Dishes for Stained Glass Cookies
Stained glass cookies pair wonderfully with various side dishes that can elevate your dessert experience. Here are some tasty options.
- Fruit Salad: A light and refreshing mix of seasonal fruits complements the sweetness of the cookies perfectly.
- Vanilla Ice Cream: Serve warm stained glass cookies with a scoop of vanilla ice cream for a delightful contrast in temperature and texture.
- Chocolate Dipping Sauce: Provide melted chocolate as a dip. The combination of chocolate and colorful cookie adds an exciting twist.
- Cheese Platter: A selection of mild cheeses balances out the sweetness and offers a savory option alongside your treats.
- Coffee or Tea: Pairing these cookies with brewed beverages enhances flavors and makes for a cozy snack time.
- Yogurt Parfaits: Layer yogurt with granola and pieces of stained glass cookie for a unique dessert option that’s both tasty and visually appealing.
- Nut Mixes: Offer assorted nuts as a crunchy counterpart to soft cookies, creating an interesting textural contrast.
- Mini Cupcakes: These bite-sized desserts can add variety while staying within the sweet theme, giving guests more options to indulge in.
Common Mistakes to Avoid
Baking stained glass cookies can be a delightful experience, but certain mistakes can hinder your results. Here are common pitfalls to watch out for.
- Ingredients: Using outdated or incorrect ingredients can negatively affect the flavor and texture. Always check your pantry before starting.
- Overmixing Dough: Mixing the dough too much can lead to tough cookies. Mix just until combined for the best texture.
- Not Chilling the Dough: Skipping the chilling step can result in cookies spreading too much. Always refrigerate your dough for at least an hour to maintain shape.
- Ignoring Baking Times: Overbaking can ruin the delicate stained glass effect. Keep a close eye on your cookies and remove them when edges are lightly golden.
- Forgetting the Parchment Paper: Baking directly on sheets can cause sticking. Always line baking sheets with parchment for easy removal.
Refrigerator Storage
- Store in an airtight container for up to 1 week.
- Place parchment paper between layers of cookies to prevent sticking.
Freezing Stained Glass Cookies
- Freeze in an airtight container or freezer bag for up to 3 months.
- Layer with parchment paper to avoid clumping together.
Reheating Stained Glass Cookies
- Oven: Preheat to 350°F (175°C) and warm cookies for about 5 minutes. This helps restore their freshness.
- Microwave: Heat cookies individually for about 10-15 seconds. Be cautious not to overdo it, as they may become tough.
- Stovetop: Use a skillet on low heat, covering with a lid for a few minutes. This method keeps them soft while warming.

Frequently Asked Questions
Here are some common questions about stained glass cookies that you might find helpful.
How do I make stained glass cookies?
To make stained glass cookies, create a basic cookie dough, cut out shapes, and fill them with crushed hard candies before baking.
Can I use any type of candy for stained glass cookies?
Yes, you can use various hard candies like Jolly Ranchers or Life Savers. Just ensure they’re colorful for the best effect!
How long do stained glass cookies last?
Stained glass cookies stay fresh for up to 1 week when stored properly in an airtight container.
Are stained glass cookies easy to make?
Absolutely! With simple ingredients and easy steps, these colorful treats are perfect for bakers of all skill levels.
Can I customize my stained glass cookies?
Certainly! You can experiment with different cookie shapes and candy combinations to create unique designs that suit any occasion.
Final Thoughts
Stained glass cookies are not only visually appealing but also versatile enough for various occasions. Whether you’re baking for holidays or simply enjoying a fun day in the kitchen, these delightful treats will surely brighten anyone’s day. Feel free to customize them with your favorite flavors and colors!
Stained Glass Cookies
- Total Time: 30 minutes
- Yield: Approximately 24 cookies 1x
Description
Stained glass cookies are a delightful blend of beauty and taste, perfect for any occasion. These sweet, buttery treats feature vibrant melted candies that create stunning stained glass effects, captivating both kids and adults alike. Whether you’re hosting a holiday gathering or enjoying a fun baking day at home, these cookies add a festive touch to your celebrations. With simple ingredients and easy steps, you’ll find this recipe accessible for bakers of all skill levels. Get ready to impress your family and friends with these colorful confections that are as enjoyable to make as they are to eat!
Ingredients
- 2 ¾ cups all-purpose flour
- 1 teaspoon baking powder
- ¼ teaspoon salt
- 1 cup unsalted butter, softened
- 1 cup granulated sugar
- 1 large egg
- 2 teaspoons vanilla extract
- ½ cup assorted hard candies (e.g., Jolly Ranchers)
Instructions
- In a mixing bowl, whisk together flour, baking powder, and salt.
- In another bowl, cream the softened butter and sugar until light and fluffy. Mix in the egg and extracts.
- Gradually combine the dry ingredients with the wet mixture until well blended.
- Divide dough into two discs, wrap in plastic wrap, and refrigerate for at least one hour.
- Preheat your oven to 350°F (175°C) and line baking sheets with parchment paper.
- Roll out chilled dough to about ¼ inch thick; cut shapes using cookie cutters while creating centers with smaller cutters.
- Fill each center with crushed candies.
- Bake for 8-10 minutes or until edges are lightly golden. Cool completely before serving.
- Prep Time: 20 minutes
- Cook Time: 10 minutes
- Category: Dessert
- Method: Baking
- Cuisine: American
Nutrition
- Serving Size: 1 serving
- Calories: 100
- Sugar: 8g
- Sodium: 50mg
- Fat: 5g
- Saturated Fat: 3g
- Unsaturated Fat: 2g
- Trans Fat: 0g
- Carbohydrates: 12g
- Fiber: <1g
- Protein: <1g
- Cholesterol: 15mg